Chủ Nhật, 3 tháng 1, 2010

Numbering Comments In Blogger

1 nhận xét
Hi friends,you would have seen for sure in blogger from a long time that,comments the readers do in some blog are numbered starting from count 1 to number of comments on that post page.As i think many bloggers dont like this hack because they don't find any use to it in there blogger but according to me its a great hack to make your blog look different from others and i have made this too simple and beautiful to implement it very easily.

And the second advantage is it makes very easy for readers to find any comment and differentiate between the comments and without numbering,it becomes difficult to find comment if there are lot comments on post,even sometimes i find this problem in wordpress blogs as even they dont use this hack but you should use it for sure.

Before proceding to the tutorial you should have embed comment form in blogger and and back up your template for sure.

Now this is how in picture below the numbering will look like while using my codes.As you can also see this live in my present template i am using in my blog.


And thanx to fernando from quiterandom to make it possible for us to make this numbering possible.

Now login to blogger GO To Layout > Edit/Html > Check Mark Expand Widgets > Press Ctrl+F and search for below codes in your template and add the red lines in between them like i have shown below.


<dl id='comments-block'>

<script type='text/javascript'>var CommentsCounter=0;</script>

<b:loop values='data:post.comments' var='comment'>

<div class='' expr:id='data:comment.id'>

<dt expr:class='"comment-author " + data:comment.authorClass' expr:id='data:comment.anchorName'>
<a expr:name='data:comment.anchorName'/>
<b:if cond='data:comment.authorUrl'>
<a expr:href='data:comment.authorUrl'><data:comment.author/></a>
<b:else/>
<data:comment.author/>
</b:if>
<data:commentPostedByMsg/>

<span class='comment-number'>
<a expr:href='"#comment-" + data:comment.id' title='Comment Link'>
<script type='text/javascript'>
CommentsCounter=CommentsCounter+1;
document.write(CommentsCounter)
</script>
</a>
</span>

</dt>
<dd class='comment-body'>
<b:if cond='data:comment.isDeleted'>
<span class='deleted-comment'><data:comment.body/></span>
<b:else/>
<p><data:comment.body/></p>
</b:if>
</dd>
<dd class='comment-footer'>
<span class='comment-timestamp'>
<a expr:href='data:comment.url' title='comment permalink'>
<data:comment.timestamp/>
</a>
<b:include data='comment' name='commentDeleteIcon'/>
</span>
</dd>

</div>

</b:loop>
</dl>


And now i need some css part to make look the counter of comments to look beautiful so you just add these below css codes before the ]]></b:skin> tag.

.comment-number {
float: right;
background: url(http://i40.tinypic.com/14tmp9e.jpg) no-repeat;
width:50px;
height:50px;
margin-right: 15px;
margin-top: -35px; /*comments-counter position*/
text-align: center;
font-family: 'Century Gothic','Lucida Grande',Arial,Helvetica,Sans-Serif;
font-size: 18px;
font-weight: bold;
}

/*since the numbers are actually links, we need to force the color properties*/

.comment-number a:link, .comment-number a:visited {
color: #445566 !important;
text-decoration: none !important;
}
.comment-number a:hover, .comment-number a:active {
color: #FF9933 !important;
text-decoration: none !important;
}


Now in above codes red link is the background to counter image you can change it with yours.And if you change image correct its width and height option in above css with the size of your image.

One problem you can face after making the css work can be the position of counter in comments.So just edit below lines in above css to make it align to proper postion in your blog if not working at perfect position for you.

margin-right: 15px;
margin-top: -35px;

Now i hope you will love his hack for sure and will use it for sure.One more thing,i insist you to use this hack for sure if you are not using it and don't forget to implement highlight blog author comment for sure as this is what makes you different from your blog readers as i can't live without these hacks.


Anshul

How Highlight Authors Comments In Blogger Blogs

0 nhận xét
How to highlight the author comments in blogger,you would have seen many highlighted colours comments in blogger posts by author in many blogs.They are highligted to differentiate the comments of author and the readers and now you will be desperate to how to implement in your blog.Many templates have installed this hack in there blog if your blog doesn't have highlighted comments read on this post.


Login to your Dashboard > Layout > Edit Html.

Check the Expand Widget Templates Check Box.
Copy and paste the code below before the closing ]]></b:skin>


.comment-body-author {
background: #ffffff;
border: 2px solid #666666;
padding: 5px;
}


Change the line
background: #ffffff;
with
background: url(http://DIRECT_LINK_OF_THE_IMAGE.jpg) ;
If you want to show any background image in place of white color.

Next, search for the following lines of code.


<dl id='comments-block'>
<b:loop values='data:post.comments' var='comment'>
<dt class='comment-author' expr:id='"comment-" + data:comment.id'>
<a expr:name='"comment-" + data:comment.id'/>
<b:if cond='data:comment.authorUrl'>
<a expr:href='data:comment.authorUrl' rel='nofollow'><data:comment.author/></a>
<b:else/>
<data:comment.author/>
</b:if>
<data:commentPostedByMsg/>
</dt>

<b:if cond='data:comment.author == data:post.author'>
<dd class='comment-body-author'>
<p><data:comment.body/></p>
</dd>
<b:else/>

<dd class='comment-body'>
<b:if cond='data:comment.isDeleted'>
<span class='deleted-comment'><data:comment.body/></span>
<b:else/>
<p><data:comment.body/></p>
</b:if>
</dd>

</b:if>

<dd class='comment-footer'>
<span class='comment-timestamp'>
<a expr:href='"#comment-" + data:
comment.id' title='comment permalink'>
<data:comment.timestamp/>
</a>
<b:include data='comment' name='commentDeleteIcon'/>
</span>
</dd>
</b:loop>
</dl>


You have to add Red codes in your html in the way i have shown above between the codes.I hope you will be able to do it.

If you have any problem leave your comments below.Best of luck!

Thứ Năm, 10 tháng 12, 2009

Related Posts with Thumbnails for Blogger

0 nhận xét


Displaying the links to related posts along with a thumbnail of the corresponding post will help you increase the page views/user .Users will be tempted to go for therelated posts when they are presented attractively with thumbnails.
This is another first release from me.This one also uses the media thumbnails generated by blogger for each post.
For displaying the thumbnails,this widget will use the images uploaded for the post using the blogger image uploader(from the post editor) [Update - Now supports external images also.]

Related Posts Widget with Thumbnails for Blogger

Here are the detailed installation steps
1.First of all Login to your blogger dashboard and navigate to Layout > Edit HTML and check the "Expand Widget Templates" check box

2.Now look for

</head>
 
and replace it with

<!--Related Posts with thumbnails Scripts and Styles Start-->
<b:if cond='data:blog.pageType == &quot;item&quot;'>
<style type="text/css">
#related-posts {
float:center;
text-transform:none;
height:100%;
min-height:100%;
padding-top:5px;
padding-left:5px;
}

#related-posts h2{
font-size: 1.6em;
font-weight: bold;
color: black;
font-family: Georgia, &#8220;Times New Roman&#8221;, Times, serif;
margin-bottom: 0.75em;
margin-top: 0em;
padding-top: 0em;
}
#related-posts a{
color:black;
}
#related-posts a:hover{
color:black;
}

#related-posts a:hover {
background-color:#d4eaf2;
}
</style>
<script src='http://blogergadgets.googlecode.com/files/relatedthumbs21.js' type='text/javascript'/>
</b:if>
<!--Related Posts with thumbnails Scripts and Styles End-->
</head>
 
3.Now Find

<div class='post-footer-line post-footer-line-1'>
 
If you cant find it then try finding this one

<p class='post-footer-line post-footer-line-1'>
 
Now immediately after any of these lines(whichever you could find) place this code snippet

<!-- Related Posts with Thumbnails Code Start-->
<b:if cond='data:blog.pageType == &quot;item&quot;'>
<div id='related-posts'>
<b:loop values='data:post.labels' var='label'>
<b:if cond='data:label.isLast != &quot;true&quot;'>
</b:if>
<b:if cond='data:blog.pageType == &quot;item&quot;'>
<script expr:src='&quot;/feeds/posts/default/-/&quot; + data:label.name + &quot;?alt=json-in-script&amp;callback=related_results_labels_thumbs&amp;max-results=10&quot;' type='text/javascript'/></b:if></b:loop><a href='http://www.bloggerplugins.org/2009/08/related-posts-thumbnails-blogger-widget.html' style='display:none;'>Related Posts with thumbnails for blogger</a><a href='http://www.bloggerplugins.org/' style='display:none;'>blogger tutorials</a>
<script type='text/javascript'>
var currentposturl=&quot;<data:post.url/>&quot;;
var maxresults=6;
var relatedpoststitle="Related Posts";
removeRelatedDuplicates_thumbs();
printRelatedLabels_thumbs();
</script>
</div><div style='clear:both'/>
</b:if>
<!-- Related Posts with Thumbnails Code End-->

4.You can adjust the maximum number of related posts being displayed by editing this line in the code.

var maxresults=6;
 
5.To edit the title of the widget you can change this line of code

var relatedpoststitle="Related Posts";
 
To change the colors and all you will have to modify the CSS

If you fall into troubles implementing this,don't panic.. :) .just leave me a comment here and i will help you out.

If you like to give me any suggestions on how to improve this widget,then it would be really great.

If you need a demo just check the related post thumbnails below this post. If you liked this widget,please do retweet and spread the news. :). UPDATE: Fixed the chrome Issue.So if you installed the widget before seeing this,then please update the widget.. :)
BloggerPlugins

Random Posts Widget For Blogger

0 nhận xét

Random Posts Widget For Blogger i.e each time the page of your blog refreshes the posts on the blog showed by this widget changes, means this widgets always shows unique posts from your blog with unique combinations at random,i.e the widget selects the posts randomly from all your blog posts and never knows which post might it pick from your blog to show.Really this is the gem of the widget you really should show on your blog for sure.

As before this i had blogged about a one more random posts widget in which a link was made and clicking on it would show random post in blog.


Now how to add this widget in the blog.

1. Log into Blogger >> Layout >> Html/Javascript .
2.Then paste this code in it.


<script type="text/javascript">
var randarray = new Array();var l=0;var flag;
var numofpost=6;function randomposts(json){
var total = parseInt(json.feed.openSearch$totalResults.$t,10);
for(i=0;i < numofpost;){flag=0;randarray.length=numofpost;l=Math.floor(Math.random()*total);for(j in randarray){if(l==randarray[j]){ flag=1;}}
if(flag==0&&l!=0){randarray[i++]=l;}}document.write('<ul>');
for(n in randarray){ var p=randarray[n];var entry=json.feed.entry[p-1];
for(k=0; k < entry.link.length; k++){if(entry.link[k].rel=='alternate'){var item = "<li>" + "<a href=" + entry.link[k].href + ">" + entry.title.$t + "</a> </li>";
document.write(item);}}
}document.write('</ul>');}
</script>
<script src="/feeds/posts/default?alt=json-in-script&start-index=1&max-results=1000&callback=randomposts" type="text/javascript"></script>


Change the the text no in red above in codes to select how many random posts you want to display.

And Save the Widget.Now you will be shown up the the title of the posts in widget like you see in recent posts, recent comments or popular posts widget and all the posts will be picked randomly.

Now How to show random posts title with post summary.

Just open this script or download this Random Post Script.

If it gets downloaded then just upload it to your file host and if it opens just copy it to notepad and save it as .js file and upload to your server.

You can get Free File Host Here.

1. Log into Blogger >> Layout >> Html/Javascript .
2.Then paste this code in it.

<script type="text/javascript">
var randarray = new Array();var l=0;var flag;
var numofpost=5;var wordnumber=5;</script>
<script style="text/javascript" src="http://www.your-file-url/random-posts-summary.js">
</script>
<script src="/feeds/posts/default?alt=json-in-script&start-index=1&max-results=1000&callback=randomposts" type="text/javascript"></script>


Just change the green url with your script url which you uploaded to your server.

Alter the codes in red in above codes to adjust the count of posts and and how much word summary you want up to show up in the widget.Thats it so Simple.
Anshul

Thứ Tư, 9 tháng 12, 2009

Adding Numbered Page Navigation Bar For Blogger

0 nhận xét

 Hi all, today we are going to learn how to add page navigation bar with numbers for blogspot blogs,
i’m sure that most of you have a lot of posts and the default blogger way to navigate between new post and old post is boring. what if your visitors wants to read for your oldest posts?
should he keep clicking on “older posts”, No.
You should apply this hack for your template, it’s one of the most useful blogger tricks ever.
so lets see how to do it.
Step 1: Adding The CSS Code.

Log into your blogger account and go to,
Dashboard >> Layout >> Edit html.
And find the following code.

]]></b:skin>
 
And just before it Add the next code

.showpageArea {padding: 0 2px;margin-bottom:10px;margin-top:10px;
}

.showpageArea a {border: 1px solid #505050;
color: #000000;font-weight:normal;
padding: 3px 6px !important;
padding: 1px 4px ;margin:0px 4px;
text-decoration: none;
}
.showpageArea a:hover {
font-size:11px;
border: 1px solid #333;
color: #000000;
background-color: #FFFFFF;
}

.showpageNum a {border: 1px solid #505050;
color: #000000;font-weight:normal;
padding: 3px 6px !important;
padding: 1px 4px ;margin:0px 4px;
text-decoration: none;

}
.showpageNum a:hover {
font-size:11px;
border: 1px solid #333;
color: #000000;
background-color: #FFFFFF;

}
.showpagePoint {font-size:11px;
padding: 2px 4px 2px 4px;
margin: 2px;
font-weight: bold;
border: 1px solid #333;
color: #fff;
background-color: #000000;

}

.showpage a:hover {font-size:11px;
border: 1px solid #333;
color: #000000;
background-color: #FFFFFF;

}
.showpageNum a:link,.showpage a:link {
font-size:11px;
padding: 2px 4px 2px 4px;
margin: 2px;
text-decoration: none;
border: 1px solid #0066cc;
color: #0066cc;
background-color: #FFFFFF;}

.showpageNum a:hover {font-size:11px;
border: 1px solid #333;
color: #000000;
background-color: #FFFFFF;
}
 
Step 2: Adding The Java Code.

Find the next code Or some similar code

<b:section class=’main’ id=’main’ showaddelement=’yes’>
<b:widget id=’Blog1′ locked=’true’ title=’Blog Posts’ type=’Blog’/>
</b:section>
 
And After the </b:section> Tag add the next code.

<script type='text/javascript'>

var home_page_url = location.href;


var pageCount=10;
var displayPageNum=6;
var upPageWord ='Previous';
var downPageWord ='Next';


function showpageCount(json) {
var thisUrl = home_page_url;
var htmlMap = new Array();
var thisNum = 1;
var postNum=1;
var itemCount = 0;
var fFlag = 0;
var eFlag = 0;
var html= '';
var upPageHtml ='';
var downPageHtml ='';


for(var i=0, post; post = json.feed.entry[i]; i++) {

var timestamp1 = post.published.$t.substring(0,19)+post.published.$t.
substring(23,29);
timestamp = encodeURIComponent(timestamp1);


var title = post.title.$t;

if(title!=''){
if(itemCount==0 || (itemCount % pageCount ==(pageCount-1))){
if(thisUrl.indexOf(timestamp)!=-1 ){
thisNum = postNum;
}

if(title!='') postNum++;
htmlMap[htmlMap.length] = '/search?updated-max='+timestamp+'&amp;max-results='+
pageCount;
}
}
itemCount++;

}

for(var p =0;p&lt; htmlMap.length;p++){
if(p&gt;=(thisNum-displayPageNum-1) &amp;&amp; p&lt;(thisNum+displayPageNum)){
if(fFlag ==0 &amp;&amp; p == thisNum-2){
if(thisNum==2){
upPageHtml = '&lt;span class=&quot;showpage&quot;&gt;&lt;a href=&quot;/&quot;
&gt;'+ upPageWord +'&lt;/a&gt;&lt;/span&gt;';
}else{
upPageHtml = '&lt;span class=&quot;showpage&quot;&gt;&lt;a href=&quot;
'+htmlMap[p]+'&quot;&gt;'+ upPageWord +'&lt;/a&gt;&lt;/span&gt;';
}

fFlag++;
}

if(p==(thisNum-1)){
html += '&lt;span class=&quot;showpagePoint&quot;&gt;'+thisNum+'&lt;/span&gt;';
}else{
if(p==0){
html += '&lt;span class=&quot;showpageNum&quot;&gt;&lt;a href=&quot;/&quot;
&gt;1&lt;/a&gt;&lt;/span&gt;';

}else{
html += '&lt;span class=&quot;showpageNum&quot;&gt;&lt;a href=&quot;
'+htmlMap[p]+'&quot;&gt;'+ (p+1) +'&lt;/a&gt;&lt;/span&gt;';
}
}

if(eFlag ==0 &amp;&amp; p == thisNum){
downPageHtml = '&lt;span class=&quot;showpage&quot;&gt; &lt;a href=&quot;
'+htmlMap[p]+'&quot;&gt;'+ downPageWord +'&lt;/a&gt;&lt;/span&gt;';
eFlag++;
}
}
}

if(thisNum&gt;1){
html = ''+upPageHtml+' '+html +' ';
}

html = '&lt;div class=&quot;showpageArea&quot;&gt;&lt;span style=&quot;
COLOR: #000;&quot; class=&quot;showpageOf&quot;&gt; Pages ('+(postNum-1)+')&lt;
/span&gt;'+html;

if(thisNum&lt;(postNum-1)){
html += downPageHtml;
}

if(postNum==1) postNum++;
html += '&lt;/div&gt;';


var pageArea = document.getElementsByName(&quot;pageArea&quot;);
var blogPager = document.getElementById(&quot;blog-pager&quot;);

if(postNum &lt;= 2){
html ='';
}

for(var p =0;p&lt; pageArea.length;p++){
pageArea[p].innerHTML = html;
}

if(pageArea&amp;&amp;pageArea.length&gt;0){
html ='';
}

if(blogPager){
blogPager.innerHTML = html;
}


}


function showpageCount2(json) {

var thisUrl = home_page_url;
var htmlMap = new Array();
var isLablePage = thisUrl.indexOf(&quot;/search/label/&quot;)!=-1;
var thisLable = isLablePage ? thisUrl.substr(thisUrl.indexOf(&quot;
/search/label/&quot;)+14,thisUrl.length) : &quot;&quot;;
thisLable = thisLable.indexOf(&quot;?&quot;)!=-1 ? thisLable.substr(0,
thisLable.indexOf(&quot;?&quot;)) : thisLable;
var thisNum = 1;
var postNum=1;
var itemCount = 0;
var fFlag = 0;
var eFlag = 0;
var html= '';
var upPageHtml ='';
var downPageHtml ='';


var labelHtml = '&lt;span class=&quot;showpageNum&quot;&gt;&lt;
a href=&quot;/search/label/'+thisLable+'?&amp;max-results='+pageCount+'&quot;&gt;
';
var thisUrl = home_page_url;


for(var i=0, post; post = json.feed.entry[i]; i++) {

var timestamp1 = post.published.$t.substring(0,19)+post.published.$t.
substring(23,29);
timestamp = encodeURIComponent(timestamp1);


var title = post.title.$t;

if(title!=''){
if(itemCount==0 || (itemCount % pageCount ==(pageCount-1))){
if(thisUrl.indexOf(timestamp)!=-1 ){
thisNum = postNum;
}

if(title!='') postNum++;
htmlMap[htmlMap.length] = '/search/label/'+thisLable+'?updated-max='+timestamp+
'&amp;max-results='+pageCount;

}
}
itemCount++;
}

for(var p =0;p&lt; htmlMap.length;p++){
if(p&gt;=(thisNum-displayPageNum-1) &amp;&amp; p&lt;(thisNum+displayPageNum)){
if(fFlag ==0 &amp;&amp; p == thisNum-2){
if(thisNum==2){
upPageHtml = labelHtml + upPageWord +'&lt;/a&gt;&lt;/span&gt;';
}else{
upPageHtml = '&lt;span class=&quot;showpage&quot;&gt;&lt;a href=&quot;
'+htmlMap[p]+'&quot;&gt;'+ upPageWord +'&lt;/a&gt;&lt;/span&gt;';
}

fFlag++;
}

if(p==(thisNum-1)){
html += '&lt;span class=&quot;showpagePoint&quot;&gt;'+thisNum+'&lt;/span&gt;';
}else{
if(p==0){
html = labelHtml+'1&lt;/a&gt;&lt;/span&gt;';
}else{
html += '&lt;span class=&quot;showpageNum&quot;&gt;&lt;a href=&quot;
'+htmlMap[p]+'&quot;&gt;'+ (p+1) +'&lt;/a&gt;&lt;/span&gt;';
}
}

if(eFlag ==0 &amp;&amp; p == thisNum){
downPageHtml = '&lt;span class=&quot;showpage&quot;&gt; &lt;a href=&quot;
'+htmlMap[p]+'&quot;&gt;'+ downPageWord +'&lt;/a&gt;&lt;/span&gt;';
eFlag++;
}
}
}

if(thisNum&gt;1){
if(!isLablePage){
html = ''+upPageHtml+' '+html +' ';
}else{
html = ''+upPageHtml+' '+html +' ';
}
}

html = '&lt;div class=&quot;showpageArea&quot;&gt;&lt;span style=&quot;
COLOR: #000;&quot; class=&quot;showpageOf&quot;&gt; Pages ('+(postNum-1)+')&lt;
/span&gt;'+html;

if(thisNum&lt;(postNum-1)){
html += downPageHtml;
}

if(postNum==1) postNum++;
html += '&lt;/div&gt;';

var pageArea = document.getElementsByName(&quot;pageArea&quot;);
var blogPager = document.getElementById(&quot;blog-pager&quot;);

if(postNum &lt;= 2){
html ='';
}

for(var p =0;p&lt; pageArea.length;p++){
pageArea[p].innerHTML = html;
}

if(pageArea&amp;&amp;pageArea.length&gt;0){
html ='';
}

if(blogPager){
blogPager.innerHTML = html;
}


}


</script>

<script type='text/javascript'>

var thisUrl = home_page_url;
if (thisUrl.indexOf(&quot;/search/label/&quot;)!=-1){
if (thisUrl.indexOf(&quot;?updated-max&quot;)!=-1){
var lblname1 = thisUrl.substring(thisUrl.indexOf(&quot;/search/label/&quot;)+14,
thisUrl.indexOf(&quot;?updated-max&quot;));
}else{
var lblname1 = thisUrl.substring(thisUrl.indexOf(&quot;/search/label/&quot;)+14,
thisUrl.indexOf(&quot;?&amp;max&quot;));
}
}

var home_page = &quot;/&quot;;
if (thisUrl.indexOf(&quot;?q=&quot;)==-1 &amp;&amp; thisUrl.indexOf(&quot;
.html&quot;)==-1){ 
if (thisUrl.indexOf(&quot;/search/label/&quot;)==-1){
document.write('&lt;script src=&quot;'+home_page+'feeds/posts/summary?
alt=json-in-script&amp;callback=showpageCount&amp;max-results=99999&quot;
&gt;&lt;\/script&gt;')
}else{document.write('&lt;script src=&quot;'+home_page+'feeds/posts/full/-/'+
lblname1+'?alt=json-in-script&amp;callback=showpageCount2&amp;max-results=99999&
quot; &gt;&lt;\/script&gt;')
}
}
</script> 
 
And Click “save template

In the above code you may only edit four lines to customize your navigation bar.
 
var pageCount=10;
In this code Number 10 control the number for posts per page, you can change it to choose how many posts per page you want to display.

Note : This Number value should be the same With in your blogger account settings
The settings can be found by going to Dashboard >> Setting >> Formatting >> Show >> 10 posts

 
var displayPageNum=6;
Number 6 here control the number of pages that will be shown in the navigation bar.
 
var upPageWord ='Previous';
var downPageWord ='Next';
if you want to change the language or just change it to any thing, please change Previous for example to Older

Final Step

This blogger trick my cause some problems if you use labels in your posts and to solve this problems you have to apply the next step for your template.

1. Add Label Gadget To Your Template by going to Layout >> page elements >> Add Gadget >> Select Labels and add it to your template.

2. go to, Dashboard >> Layout >> Edit html.
And find the following code.

<a expr:dir=’data:blog.languageDirection’ expr:href=’data:label.url’><data:label
.name/></a>
 
And replace it with the following code.

<script type='text/javascript'>
var lblname = &quot;<data :label.name/>&quot;;

lblname2 = encodeURIComponent(lblname);
var feedlink = &#39;/search/label/&#39; + lblname2+&#39;?&amp;max-results=10&#39;;
document.write(&#39;&lt;a href=&quot;&#39; + feedlink + &#39;&quot;&gt;&#39;
+lblname+&#39;&lt;/a&gt;&#39;);
</script>

And Click “save template
We are done.
Max

Show Date for all posts in Blogger

0 nhận xét

 Most bloggers prefer to display the date a post was published, which is often relevant to the subject matter of the post. Indeed, most blog templates include some elements of CSS styling for the post date (or date heading as it is often known).
When using Blogger to publish your blog, the date heading is only displayed for the most recent post of any given day. This means that if you make several posts in a single day, the date heading will only display for the last post published in this day.
While readers of your blog may be able to deduce the posting date in relation to other posts, many of us would prefer to simply display the date, especially when using a calendar icon or other template styling to display the date in a particular way.
In default Blogger templates (and indeed in most third party templates) there is no option but to use the restrictive <data:post.dateHeader> tag to display the date only for one post each day.
So in this post, I’ll explain a quick and simple customization which enables you to display the date for all posts in your blog, to inform your readers of the exact date of posting and ensure any date styling in your layout is rendered correctly.

Using the “Time-stamp” tags

The only method we can use to display the date on all posts on home and archive pages with Blogger is to replace the <data:post.dateHeader> tag with that usually reserved for the timestamp (permalink).
This is because the Blogger engine will render only one date-header statement for each day of posts, whereas timestamps are generated for each and every post.
If you take a look at the Settings>Formatting page in your Blogger dashboard, you will notice there are numerous options for formatting the date style for the timestamp, many of which mimic those used for the actual date heading.
The method we need to use for this customization involves switching the date-header tags for timestamp tags, and formatting the timestamp so it appears more like a date-heading instead.

Changing the template code to accommodate the date for all posts

This is a very simple customization to make.
Simply go to Layout>Edit HTML in your Blogger dashboard and check the “Expand widget templates” box.
Then search for the following section of code (or similar):
<b:if cond=’data:post.dateHeader’>
<h2 class=’date-header’><data:post.dateHeader/></h2>
</b:if>
Be aware that in your own Blogger template, the <h2> tags may have been replaced with a DIV or H3 tags instead. However, the surrounding code should appear in the same way.
Replace this entire section of code with the following instead:
<h2 class=’date-header’><data:post.timestamp/></h2>
Then preview your blog. If you have made more than one post in a single day, you will now see that the time-stamp is displayed for all posts on this day, whereas the date-header previously used would only display once for each day.
Optional:
As you are using the timestamp for the date heading of your posts, you may prefer to remove the timestamp from the post-footer section.
If this is the case, find the following section of code in your template:
<b:if cond=’data:top.showTimestamp’>
<data:top.timestampLabel/>
<b:if cond=’data:post.url’>
<data:post.timestamp/><a class=’timestamp-link’ expr:href=’data:post.url’ title=’permanent link’>Permalink</a>
</b:if>
</b:if>
And delete this entire section of code.
Be sure to preview your template agian before saving to ensure you have not accidentally deleted (or altered) any other aspects of your layout.

Formatting your new date heading

By default, the timestamp in Blogger blogs is set to display the time of posting, rather than the date. You may prefer to change this setting to reflect the date as this is more appropriate and informative for your blog readers.
To change this format, go to Settings>Formatting in your Blogger dashboard. On this page, you will notice a drop-down menu where you can choose the format for your timestamp:


Simply choose a setting which you feel would be more appropriate for your layout, and save this setting. Personally I prefer the full date option (ie: Tuesday, October 14 2008) though you may prefer a shorter date format instead.
Amanda Fazani

Chủ Nhật, 6 tháng 12, 2009

How to show 10 posts instead of 5 posts in blogger

0 nhận xét
One of the most popular and useful blogger hack or blogger widget is Recent Posts. This blogger hack lets you display recent posts of your blog. Maximum number of bloggers use blogger feed for this purpose. But, this method one limitation, i.e. only 5 most recent posts can be displayed. I had promised my readers that Wolverine Hacks will have a new look soon.While designing a new template for Wolverine Hacks, I planned to have a widget which can display 10 most recent posts.

How to show 10 recent posts

I tried to edit the blogger code to make this possible but all in vain. Thus, I used JavaScript to show more than 5 recent posts. Here is the code:

<script>
function rp(json) {
document.write('<ul>');

for (var i = 0; i < numposts; i++) {
document.write('<li>');
var entry = json.feed.entry[i];
var posttitle = entry.title.$t;
var posturl;

if (i == json.feed.entry.length) break;

for (var k = 0; k < entry.link.length; k++) {
if (entry.link[k].rel == 'alternate') {
posturl = entry.link[k].href;
break;
}
}

posttitle = posttitle.link(posturl);
var readmorelink = "(more)";
readmorelink = readmorelink.link(posturl);
var postdate = entry.published.$t;
var cdyear = postdate.substring(0,4);
var cdmonth = postdate.substring(5,7);
var cdday = postdate.substring(8,10);
var monthnames = new Array();
monthnames[1] = "Jan";
monthnames[2] = "Feb";
monthnames[3] = "Mar";
monthnames[4] = "Apr";
monthnames[5] = "May";
monthnames[6] = "Jun";
monthnames[7] = "Jul";
monthnames[8] = "Aug";
monthnames[9] = "Sep";
monthnames[10] = "Oct";
monthnames[11] = "Nov";
monthnames[12] = "Dec";

if ("content" in entry) {
var postcontent = entry.content.$t;
} else if ("summary" in entry) {
var postcontent = entry.summary.$t;
} else
var postcontent = "";
var re = /<\S[^>]*>/g;
postcontent = postcontent.replace(re, "");
document.write(posttitle);

if (showpostdate == true) document.write(' - ' + monthnames[parseInt(cdmonth,10)] + ' ' + cdday);

if (showpostsummary == true) {
if (postcontent.length < numchars) {
document.write(postcontent);
} else {
postcontent = postcontent.substring(0, numchars);
var quoteEnd = postcontent.lastIndexOf(" ");
postcontent = postcontent.substring(0,quoteEnd);
document.write(postcontent + '...' + readmorelink);
}
}
document.write('</li>');
}
document.write('</ul>');

}
</script>

<script>
var numposts = 10;
var showpostdate = false;
var showpostsummary = false;
var numchars = 100;
</script>

<script src="http://YOURBLOG.blogspot.com/feeds/posts/default?orderby=published&alt=json-in-script&callback=rp"></script>

<div class="clear"></div><p style="text-align:right;"><a href="http://feeds.feedburner.com/~r/wolverinehacks/~3/423845145/how-to-show-10-posts-instead-of-5-posts.html" title="Grab this wiget">Grab this Widget</a></p>

If you want to use this blogger hack, just copy this code to a new HTML/Javascript Gadget.

Nitesh Kothari

How Highlight Authors Comments In Blogger Blogs

0 nhận xét
How to highlight the author comments in blogger,you would have seen many highlighted colours comments in blogger posts by author in many blogs.They are highligted to differentiate the comments of author and the readers and now you will be desperate to how to implement in your blog.Many templates have installed this hack in there blog if your blog doesn't have highlighted comments read on this post.


Login to your Dashboard > Layout > Edit Html.

Check the Expand Widget Templates Check Box.
Copy and paste the code below before the closing ]]></b:skin>


.comment-body-author {
background: #ffffff;
border: 2px solid #666666;
padding: 5px;
}

Change the line

background: #ffffff;
with
background: url(http://DIRECT_LINK_OF_THE_IMAGE.jpg) ;

If you want to show any background image in place of white color.

Next, search for the following lines of code.


<dl id='comments-block'>
<b:loop values='data:post.comments' var='comment'>
<dt class='comment-author' expr:id='"comment-" + data:comment.id'>
<a expr:name='"comment-" + data:comment.id'/>
<b:if cond='data:comment.authorUrl'>
<a expr:href='data:comment.authorUrl' rel='nofollow'><data:comment.author/></a>
<b:else/>
<data:comment.author/>
</b:if>
<data:commentPostedByMsg/>
</dt>

<b:if cond='data:comment.author == data:post.author'>
<dd class='comment-body-author'>
<p><data:comment.body/></p>
</dd>
<b:else/>

<dd class='comment-body'>
<b:if cond='data:comment.isDeleted'>
<span class='deleted-comment'><data:comment.body/></span>
<b:else/>
<p><data:comment.body/></p>
</b:if>
</dd>

</b:if>

<dd class='comment-footer'>
<span class='comment-timestamp'>
<a expr:href='"#comment-" + data:
comment.id' title='comment permalink'>
<data:comment.timestamp/>
</a>
<b:include data='comment' name='commentDeleteIcon'/>
</span>
</dd>
</b:loop>
</dl>


You have to add Red codes in your html in the way i have shown above between the codes.I hope you will be able to do it.
Anshul

Numbering Comments In Blogger

0 nhận xét
Hi friends,you would have seen for sure in blogger from a long time that,comments the readers do in some blog are numbered starting from count 1 to number of comments on that post page.As i think many bloggers dont like this hack because they don't find any use to it in there blogger but according to me its a great hack to make your blog look different from others and i have made this too simple and beautiful to implement it very easily.

And the second advantage is it makes very easy for readers to find any comment and differentiate between the comments and without numbering,it becomes difficult to find comment if there are lot comments on post,even sometimes i find this problem in wordpress blogs as even they dont use this hack but you should use it for sure.

Before proceding to the tutorial you should have embed comment form in blogger and and back up your template for sure.

Now this is how in picture below the numbering will look like while using my codes.As you can also see this live in my present template i am using in my blog.


And thanx to fernando from quiterandom to make it possible for us to make this numbering possible.

Now login to blogger GO To Layout > Edit/Html > Check Mark Expand Widgets > Press Ctrl+F and search for below codes in your template and add the red lines in between them like i have shown below.


<dl id='comments-block'>

<script type='text/javascript'>var CommentsCounter=0;</script>

<b:loop values='data:post.comments' var='comment'>

<div class='' expr:id='data:comment.id'>

<dt expr:class='"comment-author " + data:comment.authorClass' expr:id='data:comment.anchorName'>
<a expr:name='data:comment.anchorName'/>
<b:if cond='data:comment.authorUrl'>
<a expr:href='data:comment.authorUrl'><data:comment.author/></a>
<b:else/>
<data:comment.author/>
</b:if>
<data:commentPostedByMsg/>

<span class='comment-number'>
<a expr:href='"#comment-" + data:comment.id' title='Comment Link'>
<script type='text/javascript'>
CommentsCounter=CommentsCounter+1;
document.write(CommentsCounter)
</script>
</a>
</span>

</dt>
<dd class='comment-body'>
<b:if cond='data:comment.isDeleted'>
<span class='deleted-comment'><data:comment.body/></span>
<b:else/>
<p><data:comment.body/></p>
</b:if>
</dd>
<dd class='comment-footer'>
<span class='comment-timestamp'>
<a expr:href='data:comment.url' title='comment permalink'>
<data:comment.timestamp/>
</a>
<b:include data='comment' name='commentDeleteIcon'/>
</span>
</dd>

</div>

</b:loop>
</dl>


And now i need some css part to make look the counter of comments to look beautiful so you just add these below css codes before the ]]></b:skin> tag.

.comment-number {
float: right;
background: url(http://i40.tinypic.com/14tmp9e.jpg) no-repeat;
width:50px;
height:50px;
margin-right: 15px;
margin-top: -35px; /*comments-counter position*/
text-align: center;
font-family: 'Century Gothic','Lucida Grande',Arial,Helvetica,Sans-Serif;
font-size: 18px;
font-weight: bold;
}

/*since the numbers are actually links, we need to force the color properties*/

.comment-number a:link, .comment-number a:visited {
color: #445566 !important;
text-decoration: none !important;
}
.comment-number a:hover, .comment-number a:active {
color: #FF9933 !important;
text-decoration: none !important;
}

Now in above codes red link is the background to counter image you can change it with yours.And if you change image correct its width and height option in above css with the size of your image.

One problem you can face after making the css work can be the position of counter in comments.So just edit below lines in above css to make it align to proper postion in your blog if not working at perfect position for you.

margin-right: 15px;
margin-top: -35px;

Now i hope you will love his hack for sure and will use it for sure.One more thing,i insist you to use this hack for sure if you are not using it and don't forget to implement highlight blog author comment for sure as this is what makes you different from your blog readers as i can't live without these hacks.

Anshul

Show Comment Bubble At Top Of Each Blogger Posts

0 nhận xét
How To Make Comment Bubble At Top Of Blogger Posts,as you have seen it using in many blogs and i am sure you would not be knowing how to make and show that comment bubble count and link at top of the blogger post.So that's why i am here to make you learn it,and add it to your blogs.As its not as difficult as you might be thinking of.

As you would have checked my last blogger template-The latest Blogger template for sure and must have liked it.I have made 3-4 more proffesional templates for you,but unluckily today i got my exams schedule and will not be able to post these templates for you till 30 of july,so you have to wait for them ,as they need little finishng touch and testing with an installation guide,so will post these templates in beggining of august.

So we just continue with out tutorial on how adding comment bubble to top of each blogger posts.Some tutorials like these which you would like to read for sure are show labels as tags like woork and show post date as calender widget.

For demo of comment bubble you can check the my blog as i have comment bubble or check the demo blog too.


Now To make comment bubble,Just
Login to blogger > Then go to Layout > Edit/Html > Expand Widgets > Press Ctrl+F

And Search For ]]></b:skin> tag and place the below codes before it.

.comment-bubble {
float : right;
width : 48px;
height : 48px;
background : url(http://i43.tinypic.com/dljpzo.jpg) no-repeat;
font-size : 18px;
margin-top : -15px;
margin-right : 2px;
text-align : center;
position:absolute;
}

In red above is the image link of bubble,you can use yours and don't forget to change its width and height also of the image you use.To adjust the bubble position you can edit the distance from margin-right and margin-top properties of css.

Now after adding above css just find the below codes and add the red codes in between them as i have shown below.

<b:includable id='post' var='post'>
<div class='post hentry uncustomized-post-template'>
<a expr:name='data:post.id'/>
<b:if cond='data:post.title'>
<h3 class='post-title entry-title'><b:if cond='data:post.allowComments'>
<a class='comment-bubble' expr:href='data:post.addCommentUrl' expr:onclick='data:post.addCommentOnclick'><data:post.numComments/></a>
</b:if>
<b:if cond='data:post.link'>
<a expr:href='data:post.link'><data:post.title/></a>
<b:else/>
<b:if cond='data:post.url'>
<a expr:href='data:post.url'><data:post.title/></a>
<b:else/>
<data:post.title/>
</b:if>
</b:if>
</h3>
</b:if>

Afer adding red codes in between them just preview your template,if comment bubble is ok,just save your template and you are done.Now you have added an comment bubble to bog in an very easy way you wouldn't have thought of.Enjoy this hack and let me know you liked it or not.
And Friends i will try to schedule one or two posts for you,but that for sure will be small blogger tutorials which also will be very useful for you to learn a lot.

How To Host Javascript Or .js files on Blogger Itself

1 nhận xét
How To Host Javascript Or .js files on Blogger, yes as blogger supports javascript which makes blogger support all the possible hacks in this platform, but the problem we bloggers face in using this is , where to host this javascript on blogger.As blogger doesn't provide any source to host javascript for blog like it has provided picasa for images.As of before we all were using googlepages to upload the .js files but google closed this service and switched to google sites.As still we can upload these .js files to google sites but just upload it with file extension .txt instead of .js and it start working.

But still,we can face any problem in future with it.The best solution is to have paid server to host your files for unlimited bandwidth, but bloggers using this free platform dont like spending on it.


I also provided you with the list of some servers to upload your javascript files but the problem was bandwidth which was very less.

So i will provide you the best solution to host your javascript on blogger itself and enjoy unlimited bandwidth.

Now just see the below codes.

<script src='http://Your-Script-Url/file.js' type='text/javascript'/>

Whenever you are trying to implement some hack making use of javascript you would have mostly been asked to download the .js file and upload to your own server,get its url and then replace it with red link in above codes shown above,and then place the whole above codes in blogger html before closing of head tag.The Problem we all face is getting an free server with unlimited bandwidth to host these javascripts.

So why don't we upload these javascripts to blogger itself.Just what you have to do is,whenever you are asked to do this kind of above stuff while implementing any hack.

Just use below code in place of above one i showed you.

<script type='text/javascript'>
//<![CDATA[
<--Paste all code here from .js file -->
//]]>
</script>

Just in place of red line in above code what you have to do is just open the .js file (which you are asked to download or upload to your own server) in notepad or on your browser , copy its code and paste it in place of above red line.And your javascript codes are now ready which are now hosted on blogger itself instead of hosting to third party server.

Now you will face no bandwidth problems.
Anshul

How Show Blogger Profile Images In Comments As Avatars

0 nhận xét
How To Show Blogger Profile Images In Blogger Comments.As many of us bloggers saying it as showing of avatars in blogger comments but they are not avatars, they are just your blogger profile images and many readers also get mistaken by it, But they are right to say them as avatars, as they are like avatars for our bloggers.As it has been near about an month blogger has released this feature and i have found most of the bloggers also using this in there blogs.But some still have problems and not have made the solution for blank spaces in comments for anonymous comments.So i would like to hold a complete detailed tutorial on it.The below picture show up how profile images show up in blog as i have taken this snapshot from my blog after implementing this hack.

Now How to enable the blogger profile images in blogger comments.
First of all Go to Blogger > Settings > Comments and enable “Show profile images on comment”

If you are using default blogger templates then they get enabled and profile images will start up to show in blogger comments.They can also start up to show up in some customized templates but it depends at to what extent there comment section been customized or not.

Some Of The Problems You Wouldn't Like even after Enabling Profile Images In Default Template.

There will be two major problems in it.

1)The bloggers who don't have uploaded there profile images to there profiles while comments will show up a blogger favicon of size 16x16 like below.It doesn't look good from my point of view because the blogger profile images show up a picture of size 35x35.


2) The bloggers who do comments with there blog urls or anonymous comments will end up with a blank space in comments.That looks really awkward.It destroys the beauty of comment system as you can see from below image.

I have shown all the 2 problems in above picture as i hope it will be clear to you right now.Now we need to solve these problems.But first i would like to tell you about how to enable profile images in comments in blogs who are using customized templates, just what they they need is to edit small bit of codes in there blogger html.Now carry on with this tutorial.

How Enable Blogger Profile images In Customized Templates

First of all enable the feature of profile images in your blogger settings as i showed above.Now check your comments.If it shows up blogger profile images in comments,then its ok else follow next step.

First step Go to Blogger Layout >Edit HTML and backup your template.Now Expand the widget templates and check if you can find this line there

<dl expr:class='data:post.avatarIndentClass' id='comments-block'>

If you don't find above line then find below line:-

<dl id='comments-block'>

And replace it with the above line which you didn't found in your codes.

And if you still not able to find the above line you may get this one:-


<div id='comments-block'>


And replace it with the top most line which you didn't found initially.

Now find this line in code:-

<a expr:name='data:comment.anchorName'/>

And replace it with below codes.

<b:if cond='data:comment.favicon'>
<img expr:src='data:comment.favicon' height='16px' style='margin-bottom:-2px;' width='16px'/>
</b:if>
<a expr:name='data:comment.anchorName'/>
<b:if cond='data:blog.enabledCommentProfileImages'>
<div expr:class='data:comment.avatarContainerClass'>
<data:comment.authorAvatarImage/>
</div>
</b:if>

If you are using the author comment highlighting trick then you will get this code <a expr:name='data:comment.anchorName'/> once more in your template.So replace it also with above codes.

Now Save your template and you will be now able to see blogger profile images in your comments as i showed above in picture but with the two problems of showing favicon of small size and blank space for anonymous and other url comments.

Solution For The Problem

What we need is now to resize the blogger favicon to the size of blogger profile images and we need one more image for showing up for anonymous and url comments.As Soufiane from LeBlogger was the first to come out with the solution and helping us.

Now Just Go to blogger edit/Html and find for ]]></b:skin> tag and place the below css codes before it.

/* Avatar */
.avatar-image-container img {
background:url(http://www.gravatar.com/avatar/ad516503a11cd5ca435acc9bb6523536?s=35);
width:35px;
height:35px;
}

You can just edit the image link, height and width in above css codes as you like.

Save it, You're done.

Now The the above image will be shown up for anonymous and url comments and favicon will be resized to width and height of size as you set as above in css codes.Now check how the better comments look as compared to above i shown.


I am sure now you will have no problems in implementing this in your blogs.

Anshul

How Show Post Date For Blogger Posts Done On Same Day

0 nhận xét
How To Show The Post Date For All Your Blogger Posts you do on your blog including posts you have done On same day i.e as in blogger you have an option of date-header to show up the date for each post that you have done in blogger to show up when it was posted.But there is only one small problem in this feature,as when we do more than one post on same day the date shows up only for one post,that is last one not for both.So if you have problem with this and interested in displaying the date of post in all posts,you can solve this problem following this tutorial.Check the below image showing two posts of my demo blog which i have done on same day.


You will see as date is being shown for only one post.To solve this follow these Steps:-

1. Login to blogger
2. Click Layout
3. Click Edit HTML tab
4. Check the small box next to the text “Expand Widget Template"
5. Find this code :

<b:if cond='data:post.dateHeader'>
<h2 class='date-header'><data:post.dateHeader/></h2>
</b:if>

6.Remove the code and replace with this one:

<b:if cond='data:post.dateHeader'>
<script>var ultimaFecha = &#39;<data:post.dateHeader/>&#39;;</script>
<h2 class='date-header'><data:post.dateHeader/></h2>
<b:else/>
<h2 class='date-header'>
<script>document.write(ultimaFecha);</script>
</h2>
</b:if>

7. Click "SAVE TEMPLATE".
8. Done

Now it will show date for both posts as below.

Now, all of your posts in the same day will include the date.
Anshul

How Auto Adjust Images Size In Blogger Posts

0 nhận xét
How Auto Adjust Images Size In Blogger Posts,yes friends many of us would be daily posting some images in there blogger posts or would have photo blogs and would be tired of giving the width and height to there post images again and again to adjust and look good in there blogs.And dont they think when they will switch to new template the width and height assigned to images in post can create problems for them.And many of blogs would be facing problems if they post images with width longer than post section and image would overlap the sidebar and if not overlapping then only part of the image in post section will be visible rest part hidden.So i will be telling you on how to auto adjust images size in blogger posts to suit your blog needs.

Now Please look at the pictures carefully to know what i am exactly talking about.

Suppose you have post section of width 500px and you post a picture of width 800px in the post without defining any width and height to it.Note if you uploading through blogger editor it automatically define width and height to image so will never face error in that.

The image would appear in post like below two methods.

1) As image width was 800px,Image width get shortened and will show up in post upto 500 px and rest 300px will be hidden.


2) Full Image is shown but overlap the sidebar.


But the proper way the image should be shown in blogger post should be like below.


So to make it correct i am making you learn this css property for your blog,if you are facing any of these problems.

As say you have an blog and want to show images of width equal to post section i.e you have post section of width 500px and you want to show images to autoadjust to that size in your post.For doing that just go to blogger Layout >> Edit/Html and add the below codes before ]]></b:skin> tag :-


.post img {
max-width:500px;
max-height:500px;
min-width:200px;
min-height:200px;
border: none;
text-align: center;
padding : 10px;
clear: both;
}


Just adjust the properties min-width,min-height and max-width and max-height.As after using above codes now in your post the image width and height will never get less than 200px and not more than 500px.So image size will always lie between 200-500px.If image size is less than 200px it will auto adjust to 200px and if more than 500px it will autoadjust to 500px.

Now if you wanna use all images in your posts of same height and width i.e mostly used by all photo blogs to show of all the images of same sizes.You can use below codes.


.post img {
width:500px;
height:400px;
padding:10px;
}


Now all the images of any size in post will appear to auto adjust to size of width 500px and height 400px.

**Note:- If not working properly , there might be image property defined in your template,just find for it and check it.Find for .post img tag to check it.

Anshul

Thứ Bảy, 5 tháng 12, 2009

Add Labels Rss Feed Link Button To All Your Blogger Categories

0 nhận xét
How To Add Rss Feeds Image button in front of all your blogger labels,yes friend now you can add rss feeds button to your each label so that your readers can subscribe to your particular categories only they like the most instead of subscribing for your all blog posts.This is very useful for blogs who have mixed type content with several different categories in there blog.

As you would have seen my previous post on all the feed urls provided by blogger to get subscribe.

With the help of this now we are able to add a subscribe button for each blogger label or category in front of it as this will be very useful for our readers.

As you can check for demo the labels with rss button link in my Blogger Templates blog.

Now let's see how to add this rss feed button to each blogger label.

Important-You must have installed your label widget in your sidebar before continuing this hack,otherwise you will not find below codes.

Login to Blogger Then Go To Layout > Edit Html > Expand Widgets.

Now search for below codes :-


<b:loop values='data:labels' var='label'>
<li>
<b:if cond='data:blog.url == data:label.url'>
<span expr:dir='data:blog.languageDirection'><data:label.name/></span>
<b:else/>
<a expr:dir='data:blog.languageDirection' expr:href='data:label.url'><data:label.name/></a>
</b:if>
<span dir='ltr'/>
</li>
</b:loop>


And replace the above codes with below one :-


<b:loop values='data:labels' var='label'>
<li>

<a expr:href='data:blog.homepageUrl + &quot;feeds/posts/default/-/&quot; + data:label.name'><img alt='Subscribe' src='http://www.feedburner.com/fb/images/pub/feed-icon16x16.png' style='vertical-align:middle;border:0'/></a>

<b:if cond='data:blog.url == data:label.url'>
<span expr:dir='data:blog.languageDirection'><data:label.name/></span>
<b:else/>
<a expr:dir='data:blog.languageDirection' expr:href='data:label.url'><data:label.name/></a>
</b:if>
<span dir='ltr'/>
</li>
</b:loop>


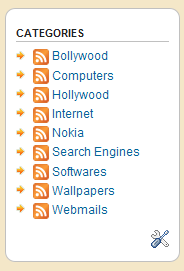
This is how in the below picture,your labels will look now with rss feed buttons.


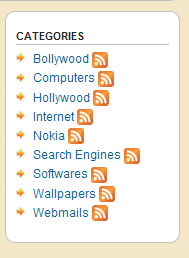
As in the picture above the rss buttons are before the blogger labels but if you want to add rss feeds button after the labels like in below picture.


Use these codes:-


<b:loop values='data:labels' var='label'>
<li>
<b:if cond='data:blog.url == data:label.url'>
<span expr:dir='data:blog.languageDirection'><data:label.name/></span>
<b:else/>
<a expr:dir='data:blog.languageDirection' expr:href='data:label.url'><data:label.name/></a>
</b:if>
<span dir='ltr'/>

<a expr:href='data:blog.homepageUrl + &quot;feeds/posts/default/-/&quot; + data:label.name'><img alt='Subscribe' src='http://www.feedburner.com/fb/images/pub/feed-icon16x16.png' style='vertical-align:middle;border:0'/></a>

</li>
</b:loop>


Now just what i have done is just addded small piece of red code in between the codes of labels.The code simply contains a image of rss feed which i have taken from feedburner site to have no problem in use for everybody and i have linked that image with the rss subscribe url for blogger labels.If you dont like image you can change it with yours.

With the use of this it becomes very easy for your reader to subscribe for only your favorite content instead for all posts.I dont know you need this or not but me wanted it for sure for my new blog which has all mixed content.
Anshul

Automatic Read More Hack With Thumbnail for Blogger Bug Fixed

0 nhận xét


Superb Automatic Thumbnail Read More Hack For Blogger / Blogspot.. This Hack By Me is 100 % Working On Any template you Use. Simple To Install No Javascript So Your Blog With Load Faster Than Before..


Advantages Of This Hack
  • It Automatically Displays Images From Your post and than Your Post Content
  • No Need To Add Any Code To Your Post
  • No Need To Update Your Old Post
  • Fancy Read more Image . Check The Screenshot above
  • No Javascript So Your Blogs Open Faster
  • Is 100 % compatible with Every Blogger Template
Now Lets See How To Do This

  • Login To Blogger
  • Go To Layout ---> Edit Html
  • Click On Expand Widget
  • Now Find The Code </head> and pate the below code above it
<script type='text/javascript'>var thumbnail_mode = "no-float" ;

summary_noimg = 430;

summary_img = 340;

img_thumb_height = 100;

img_thumb_width = 120;

</script>

<script type='text/javascript'>

//<![CDATA[

function removeHtmlTag(strx,chop){

if(strx.indexOf("<")!=-1)

{

var s = strx.split("<");

for(var i=0;i<s.length;i++){

if(s[i].indexOf(">")!=-1){

s[i] = s[i].substring(s[i].indexOf(">")+1,s[i].length);

}

}

strx = s.join("");

}

chop = (chop < strx.length-1) ? chop : strx.length-2;

while(strx.charAt(chop-1)!=' ' && strx.indexOf(' ',chop)!=-1) chop++;

strx = strx.substring(0,chop-1);

return strx+'...';

}


function createSummaryAndThumb(pID){

var div = document.getElementById(pID);

var imgtag = "";

var img = div.getElementsByTagName("img");

var summ = summary_noimg;

if(img.length>=1) {

imgtag = '<span style="float:left; padding:0px 10px 5px 0px;"><img src="'+img[0].src+'" width="'+img_thumb_width+'px" height="'+img_thumb_height+'px"/></span>';

summ = summary_img;

}


var summary = imgtag + '<div>' + removeHtmlTag(div.innerHTML,summ) + '</div>';

div.innerHTML = summary;

}


//]]>

</script>


  • Now Find The code <data:post.body/> and replace it by below code
<b:if cond='data:blog.pageType != "item"'>


<div expr:id='"summary" + data:post.id'><data:post.body/></div>

<script type='text/javascript'>createSummaryAndThumb("summary<data:post.id/>");

</script> <span class='rmlink' style='float:right;padding-top:20px;'><a expr:href='data:post.url'><img src='http://i37.tinypic.com/351icqx.jpg'/></a></span>


</b:if>

<b:if cond='data:blog.pageType == "item"'><data:post.body/></b:if>
  • Click Save Template .. You are Done
Explanation Of This Hack

summary_noimg = 430; is text count cut height without image
summary_img = 340; is text count cut height with image
img_thumb_height = 100; is height of image to Show
img_thumb_width = 120; is Width Of Image To Show


You Can Also Change The Read More Image To Text You Want Just Replace The code
<img src='http://i37.tinypic.com/351icqx.jpg'/> with Your Text

Player

  Sản phẩm mới của KNC